
Before we jump into how to setup VegaOS and build your very first button (I know! I remember my first button too). Let’s cover what Fire TV itself is. Fire TV is Amazon’s line of streaming devices and smart TV platforms that let you waste valuable sleep hours watching Prime Video, Netflix, and Disney+.
Traditionally, these devices have run Fire OS, Amazon’s customised version of Android. Recently, Amazon introduced Vega OS, a brand-new operating system built from scratch on a Linux foundation instead of Android — designed to be lighter and more tightly controlled by Amazon.
We sat in the Vega OS workshop at RNL Conf London 2025 with the dream team of operating-system builders themselves, where we learned how to build a React Native application for Vega OS. We also got free Fire TV sticks. Well… we gave out free tickets — so if you missed it, that FOMO is on you.
Why would you want to build for Fire TV anyway?
Well, Amazon Fire TV has 250+ million users, which is roughly 3% of the world’s population. So why build or port your app to Fire TV? Of course, to talk that ca-a-ash — ’cause a lotta wags wanna hear it.
Kepler, Brew, and Other Spells
So you need to install a few things. Of course — this sh*t doesn’t build itself (not yet anyway). You’ll need Node 16+, Homebrew, and the Vega OS development utilities
[[ $(arch) == "arm64" ]] && softwareupdate --install-rosetta --agree-to-license; brew update && brew install binutils coreutils gawk findutils grep jq lz4 gnu-sed watchman
Once those are installed, you can proceed with installing the Vega SDK.
curl -fsSL https://sdk-installer.vega.labcollab.net/get_vvm.sh | bash && source ~/vega/env
When prompted to install the Vega extension for Visual Studio Code, say “yes” — you’ll need VS Code installed.

And I know what you’re about to say before I finish this sentence: (winey voice) “But I don’t use VS Code.” Relax. I know you’ll hipsters, not coding in your mum’s basement at 40, and probably running some ultra-custom IDE setup. Vega Studio is also available for other IDEs (i.e. Cursor), which we’ll cover a bit later.
Once that’s done, you can run something along the lines of this to verify the installation:
vega --version # Shows Active SDK Version and Vega CLI Version
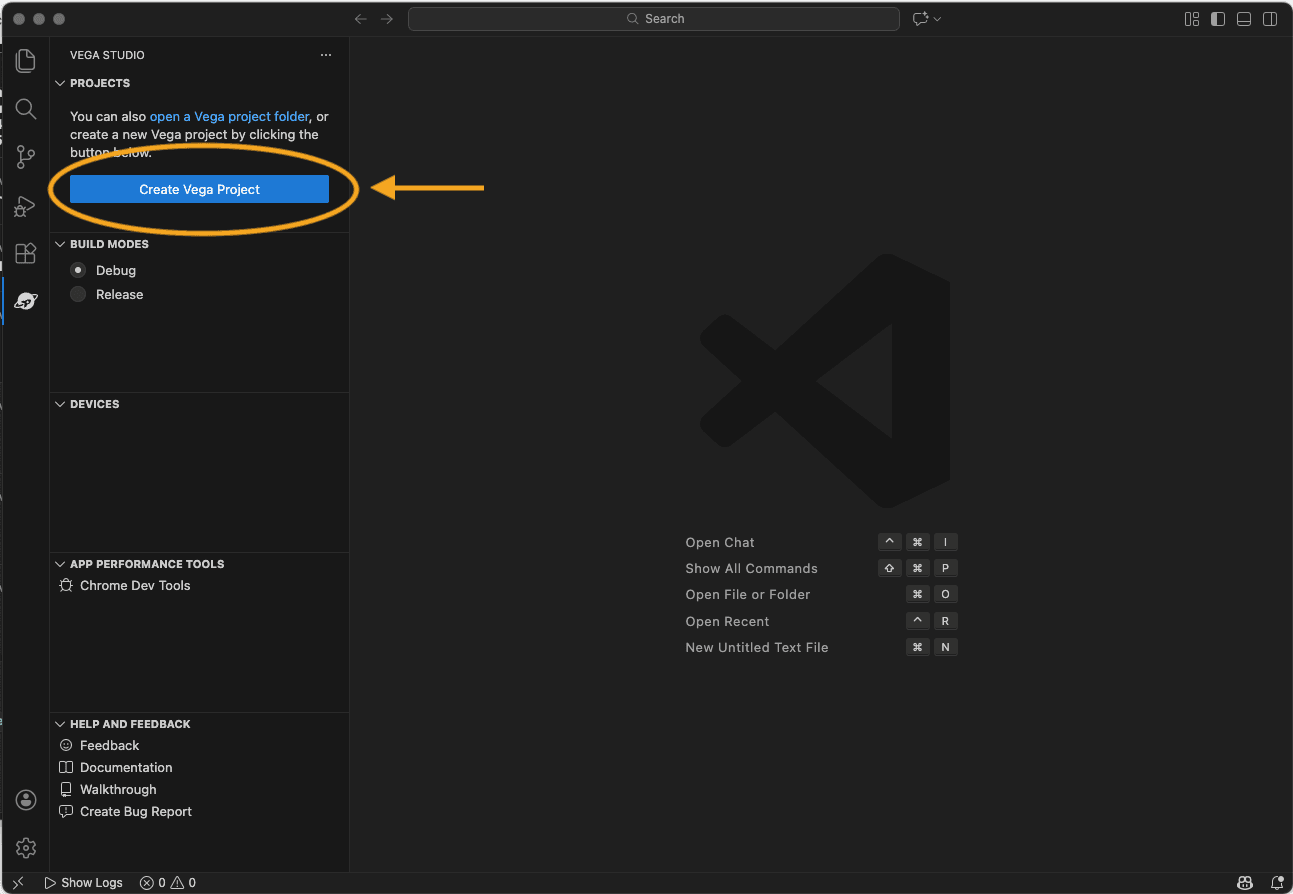
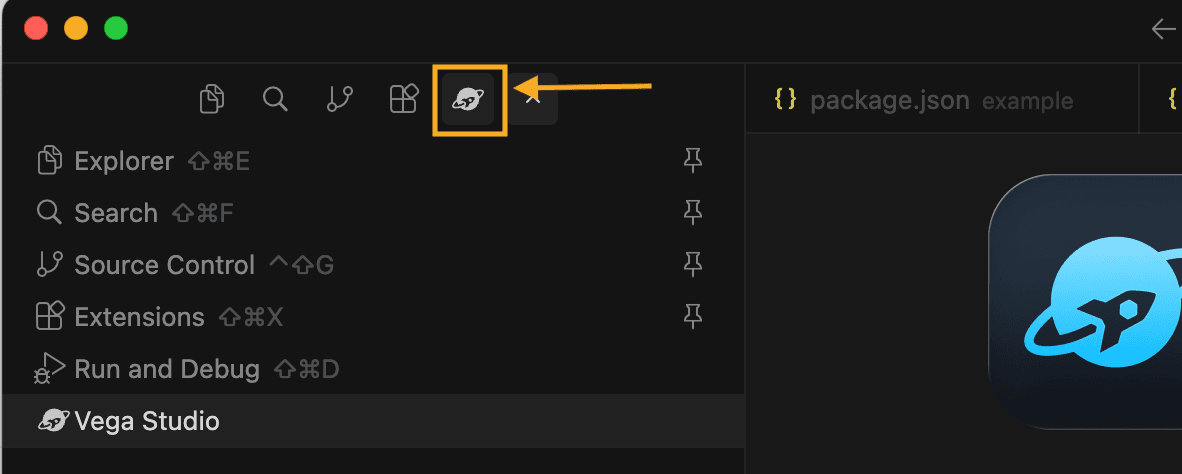
You can now open VS Code, where you should see the Vega Studio icon. Click “Create Vega Project”, which runs the Vega CLI behind the scenes to scaffold a new project.
Note: Here we’re covering how to set up a new Vega project. If you want to take an existing React Native app and port it to Vega, you’ll need to configure a monorepo (a single repository that holds the code for multiple projects or packages) with your Vega app.
This is because Vega currently supports React Native up to 0.72, so you’ll need two projects sharing code and developing in sync. Software Mansion has a great article on integrating Vega OS into an existing project.
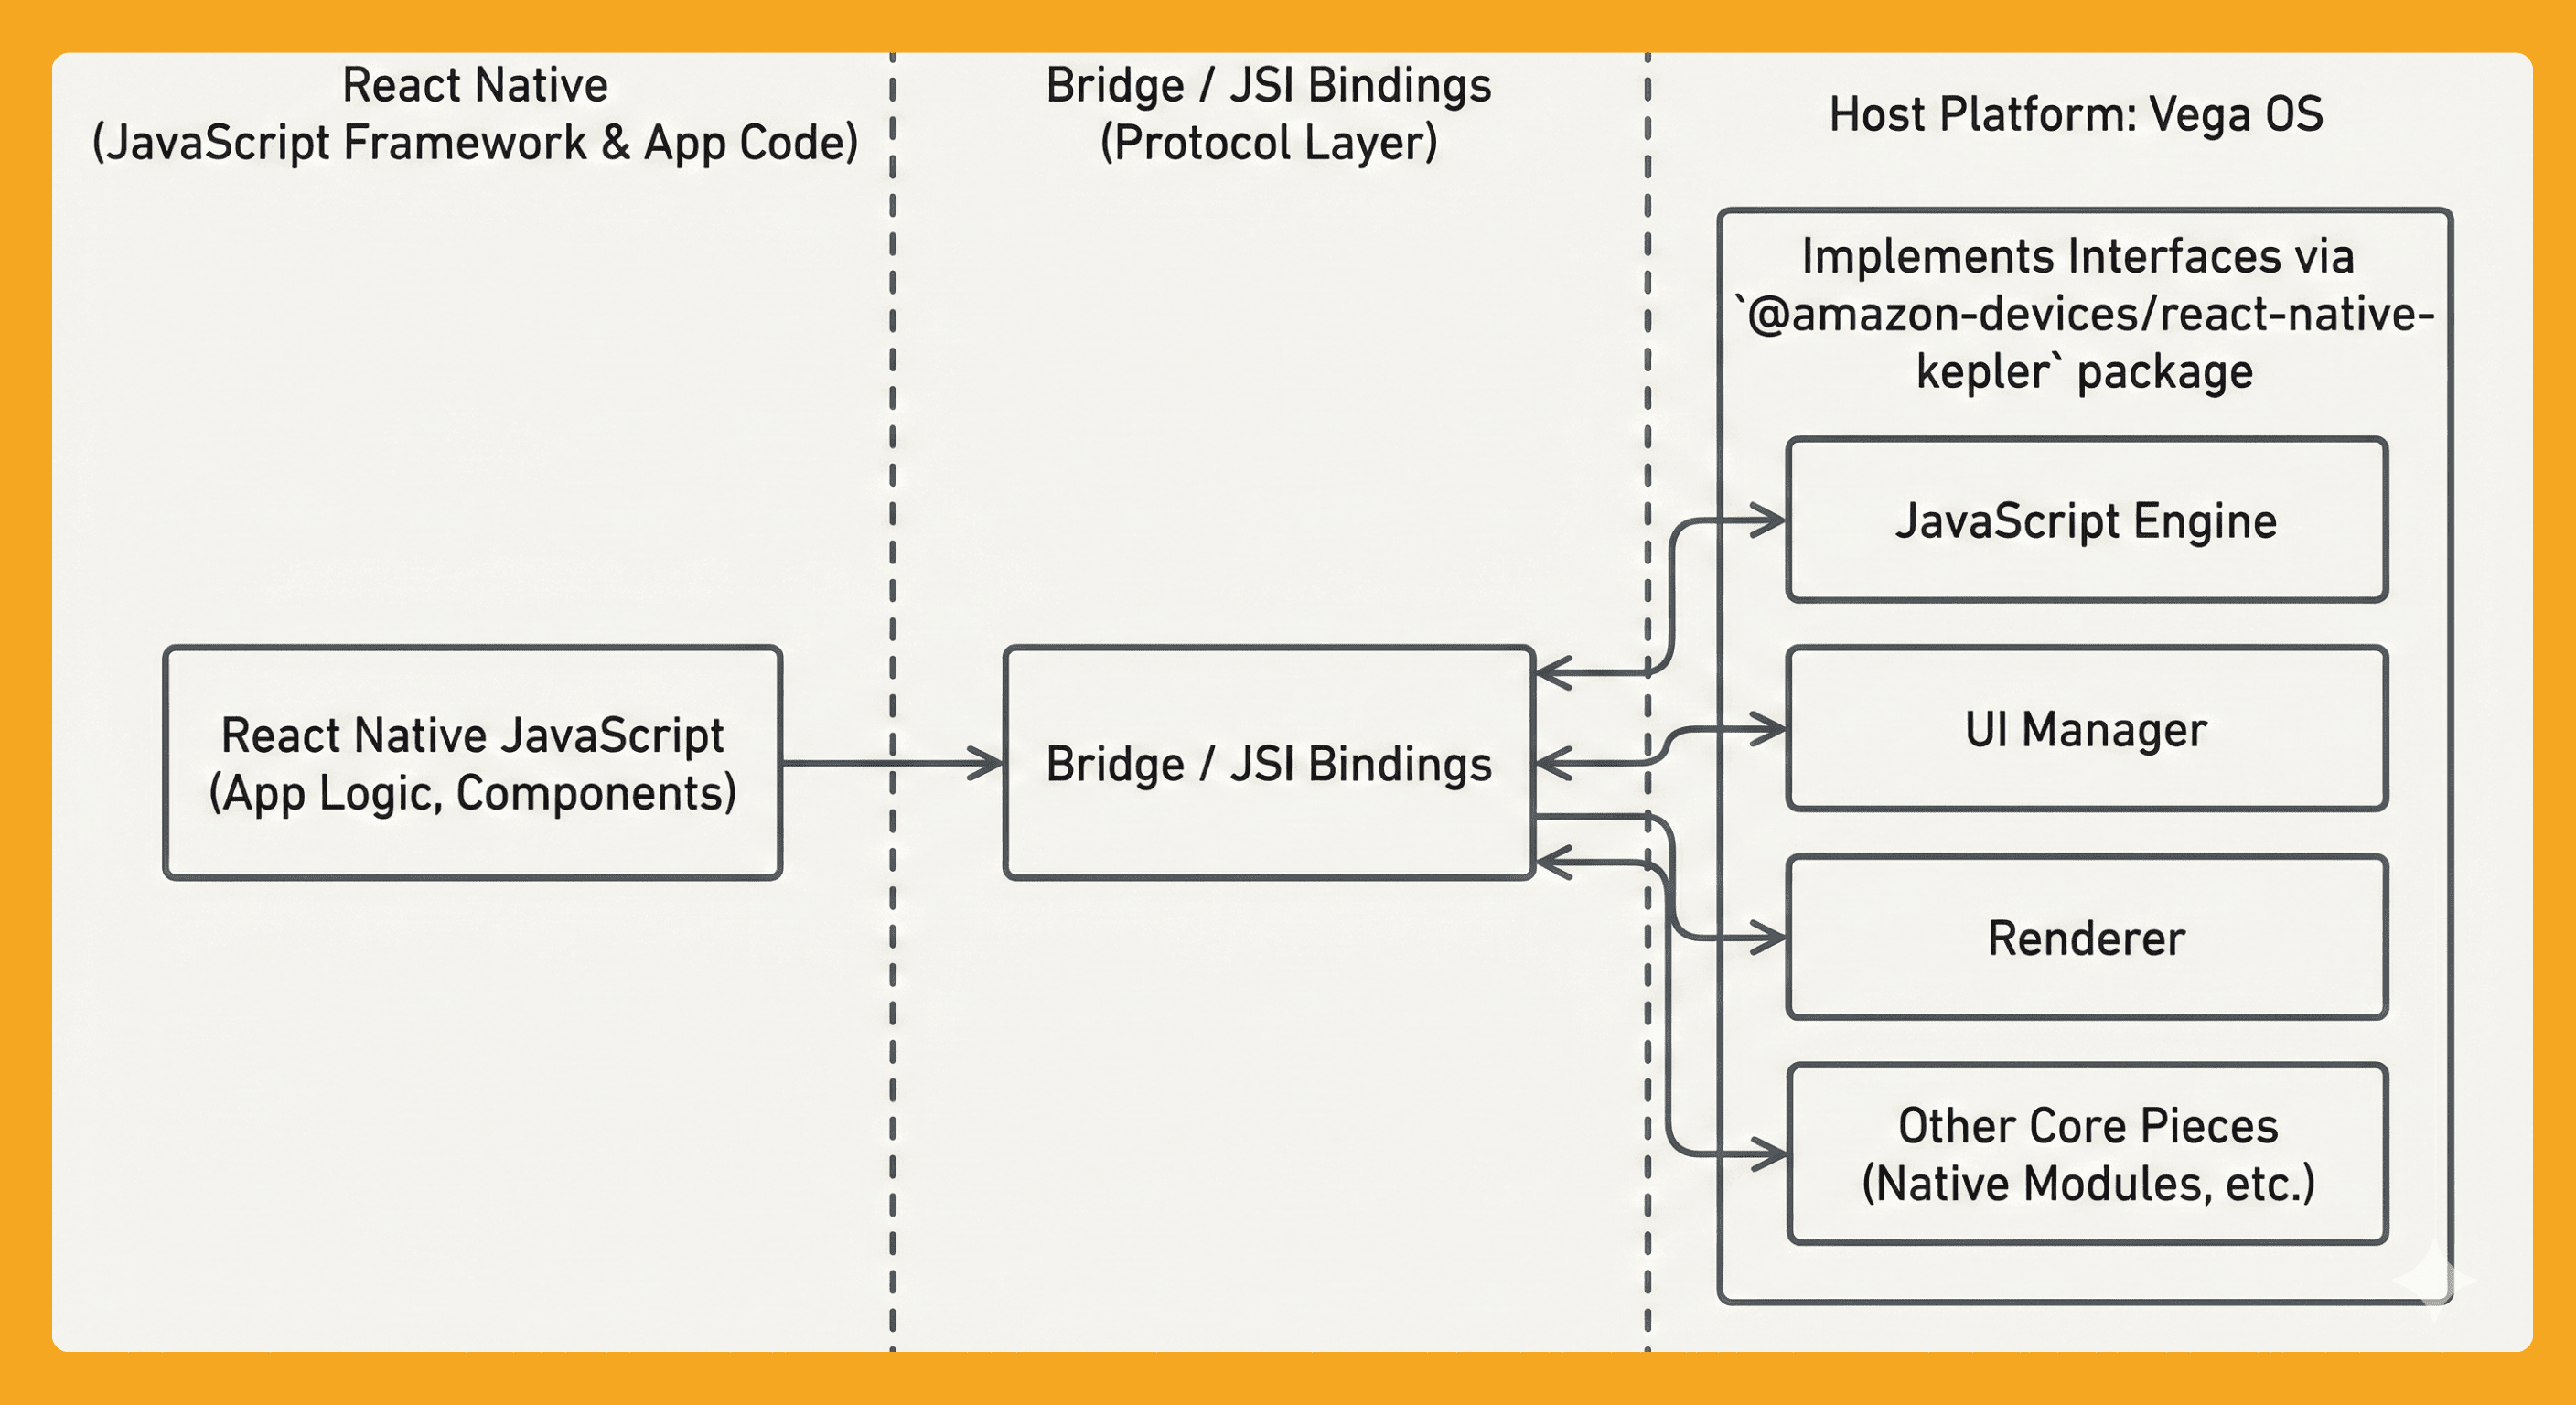
Let’s pause here for a moment — it’s worth understanding how all of this works under the hood. To understand how Vega OS works, we first need to understand React Native. React Native is not iOS, Android, or Windows; it is a protocol plus a JavaScript framework.
At runtime, React Native JavaScript expects a host platform to provide a JavaScript engine, a bridge or JSI bindings, a UI manager, a renderer, and other core pieces. Vega implements these same interfaces via the @amazon-devices/react-native-kepler package, which you’ll see installed in a new Vega project.
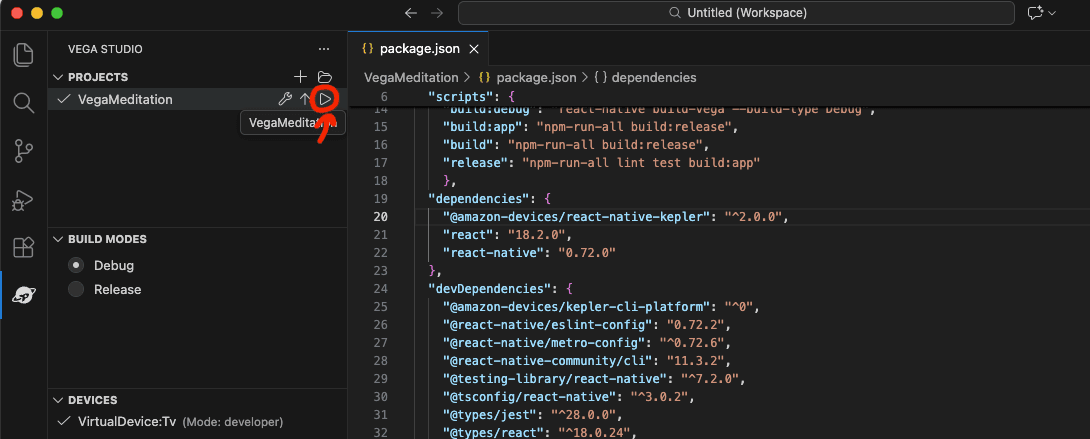
Okay, let’s continue. We’re assuming your project has been created — the next thing you do is simply launch the simulator and build your project by pressing the little triangle (▶) button.
Okay, after that, you should see your “Hello World” Vega app on a FireTV simulator.
IDE Hipsters, This One’s for You
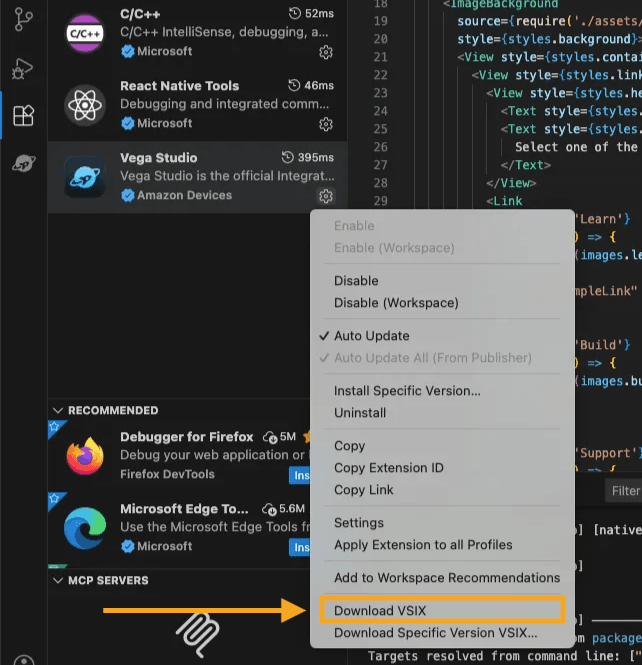
During the workshop in London, we found that installing the plugin directly from other IDEs’ plugin stores doesn’t always work. Luckily, we got some insider knowledge from the Vega OS team on how to install the plugin in any IDE if the store install fails.
Head to the plugins page, click the gear icon, and choose “Download VSIX”.
From there, the installation steps depend on your IDE. We’ll cover how to install it in Cursor, but the idea is the same elsewhere (just Google *“How to install a VSIX in <your IDE>” — not literally).
In Cursor, open the command palette with Cmd + Shift + P, then type “Install from VSIX”.

And… TADA! You’ve got Vega Studio running in the IDE of your choice.
The Part Where We Build a Button
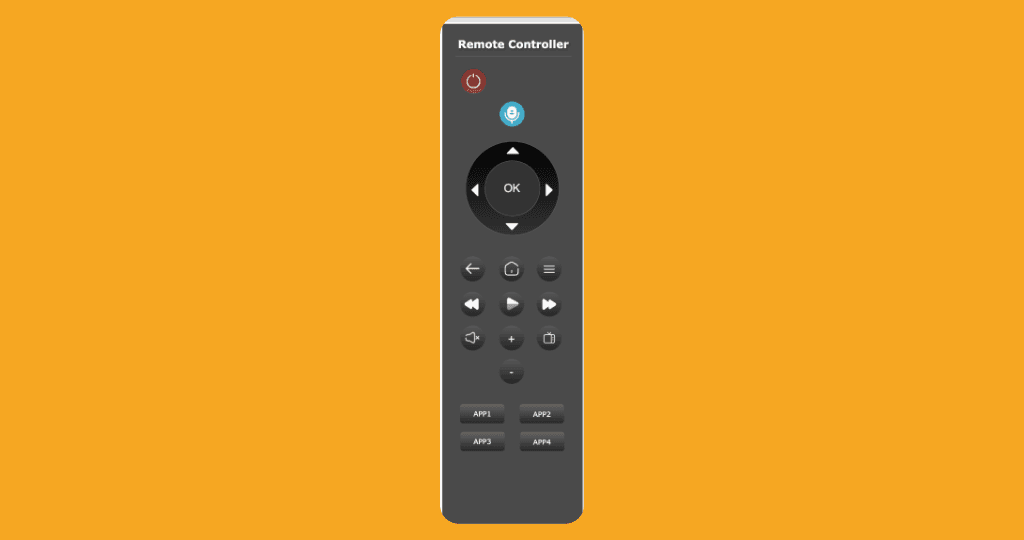
When we think about React Native on Fire TV, we’re working within a specific set of limitations. One is that there’s only a small amount of RAM available—what comes with the Fire TV Stick. We also need to design for a different interface: the “Remote Controller.” So, we’re not working with a touch screen or a cursor, but a point-and-click stick.
Its important to mention only a subset of react native libraries work on Fire TV. You can actually explore this by using the “Works on Fire OS” checkbox on the React Native Directory.
With that in mind…
So one thing we think it’s worth exploring is the handling of the remote controller interface with Fire Stick TV, to manage interactions we use a hook called useTVEventHandler which has a list of event types (up, down, left, right, select, back, menu, playpause, etc.) so essentially our code would look like this:
import { useTVEventHandler, TVEventHandler } from '@amazon-devices/react-native-kepler'; import type { HWEvent } from '@amazon-devices/react-native-kepler'; useTVEventHandler(handleTVEvent); const handleTVEvent = useCallback((evt: HWEvent) => { if (!evt?.eventType) return; switch (evt.eventType) { case 'up': ... break; ... } }, []);
It’s worth noting that to observe button events on the controller (i.e. left, right, up, and down), you’ll need to add the following to the manifest.toml file at the root of your Vega project:
#Required for remote button events. [[wants.service]] id = "com.amazon.inputd.service"
But this brings up questions, if we think about a traditional React Native app, which uses touch for interactions. How does that work on Fire TV?
Well, you can use a Button, Pressable or TouchableOpacity from React Native without any additional code on Fire TV. The way it works is that you use the Firestick remote arrows to focus elements on the screen (see example video below). Vega OS will automatically determine which is the next and previous element based on the direction of the arrow which is pressed and the position of the element on the page.
So in the example above we have three Buttons and a Pressable, so Fire TV applies its own focus style to the buttons which is a slight "practically invisible” opacity. So to apply our own style we need to use the React Native Pressable component which supports onFocus and onBlur callbacks and let us apply our own styling, we’d do it as such:
const [isFocused, setIsFocused] = useState(false); <Pressable onFocus={() => setIsFocused(true)} onBlur={() => setIsFocused(false)} style={({ pressed }) => [ styles.button, isFocused && styles.buttonFocused, // focus style pressed && styles.buttonPressed, // pressed style ]} > <Text style={styles.text}>Pressable</Text> </Pressable>
By using Pressable you can now handle the style of the button at the different states of it’s interaction.
The in-built focus works well, but let’s take it a step further and talk about Focus Manager API, let’s take the example where we have two rows of Pressable’s:
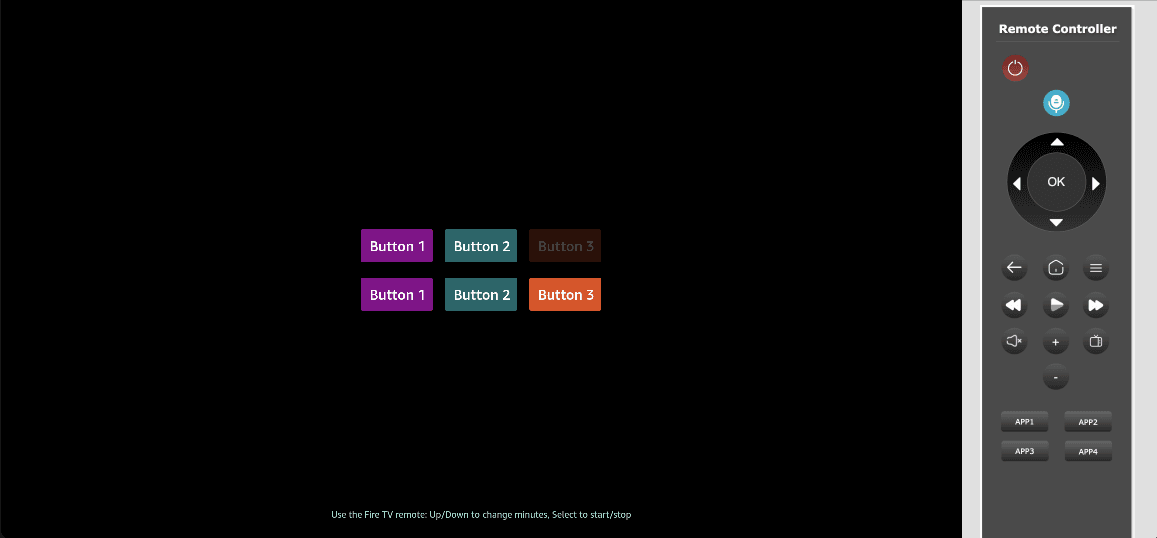
We want it to behave so that when you reach the end of a row and press the right arrow, focus moves to the next row. Vega OS’s built-in focus inference won’t handle this for us, so this is where we’d use the Focus Manager.
Essentially, Focus Manager works by setting up focus relationships when a group of components mounts, defining where focus should move based on the direction pressed.
setNextFocus: (fromTag: number, toTag: number, direction: string) => void;
So in our case where we want the last button in row one to focus the first button in row two, we’d have something like this:
useEffect(() => { const t = setTimeout(() => { const r1_3 = findNodeHandle(row1_3Ref.current); const r2_1 = findNodeHandle(row2_1Ref.current); if (r1_3 != null && r2_1 != null) { FocusManager.setNextFocus(r1_3, r2_1, 'right'); FocusManager.setNextFocus(r2_1, r1_3, 'left'); } }, 100); return () => clearTimeout(t); }, []);
And this means that when we are focussed on “r1_3” and press “right” the focus state will navigate to “r2_1”, and vice-versa if you are in “r2_1” and you click “left”. You can see it in action:
In the code above you probably noticed the setTimeout, and thought “ah yes, desperation”. The reason we need to do this is due to a limitation in the Vega SDK and Focus Manager that “Calling these APIs from the useEffect hook can fail the first time that the component is mounted. This occurs due to a known issue in Vega where useEffect can execute earlier than expected. You can work around this issue by adding a timeout/delay to your useEffect logic”.
Hopefully, in this short guide you learned a few things and got a deeper understanding of Vega OS, and you come away thinking, it ain’t that hard…

This deep dive was sponsored by Amazon. If you want to see how to actually monetize your existing code on their platform, check out their developer documentation here.
