
The New Marvel Superhero
So it’s been quite the fortnight. The race to Live Activities and Widgets in React Native continues, and Callstack has finally released Voltra (we discussed it briefly in #19). Previously, widgets (iOS widgets are small UI components that live on the Home or Lock Screen) have been notoriously hard in React Native, and you’d most likely need to tinker with XCode targets, write Swift code, and somehow communicate between the widget and your main app, usually by writing to storage.
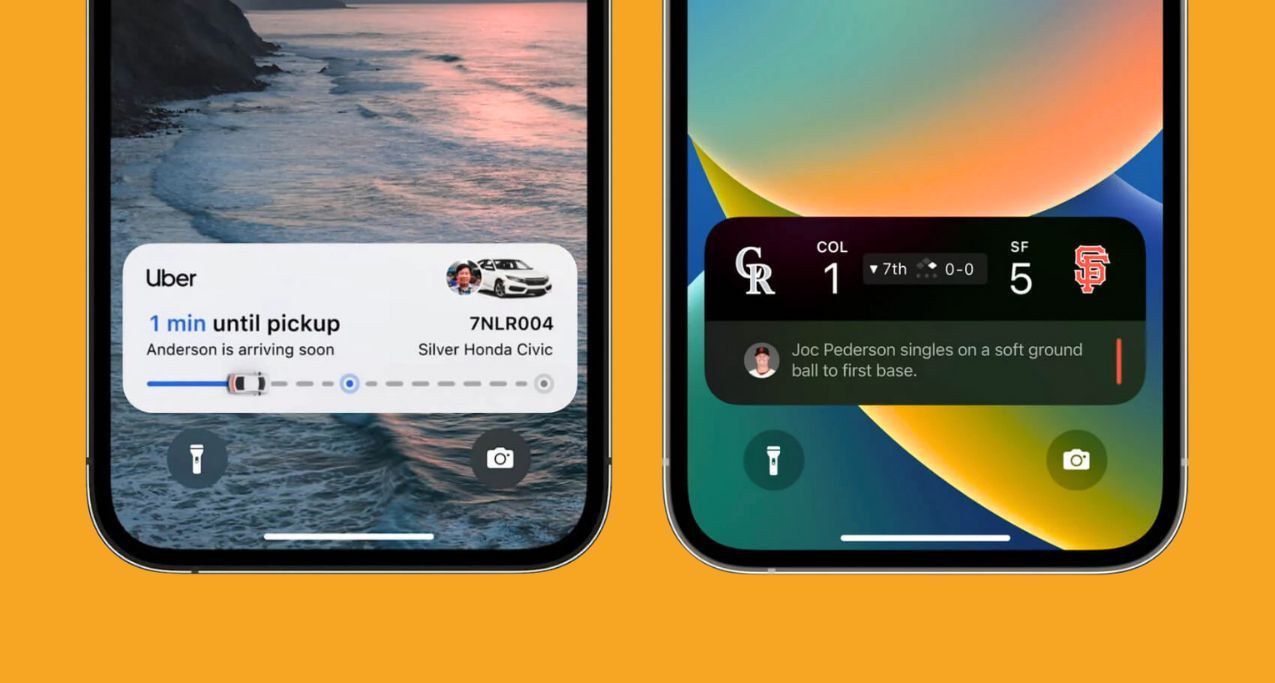
Now to recap. Live Activities are Apple’s framework for showing real-time updates outside your app — on the Lock Screen, and on newer iPhones, inside the Dynamic Island. Think of them as reactive widgets for the real world: a countdown timer, a delivery tracker, a tiny car icon inching toward your house at 1px per minute.
But now, with Voltra, new limits—never before imagined by children across the globe—have been unlocked. With Voltra, instead of relying on some JSON config or preconfigured layout, you can build your own layouts for Widgets and Live Activities… wild, we know!
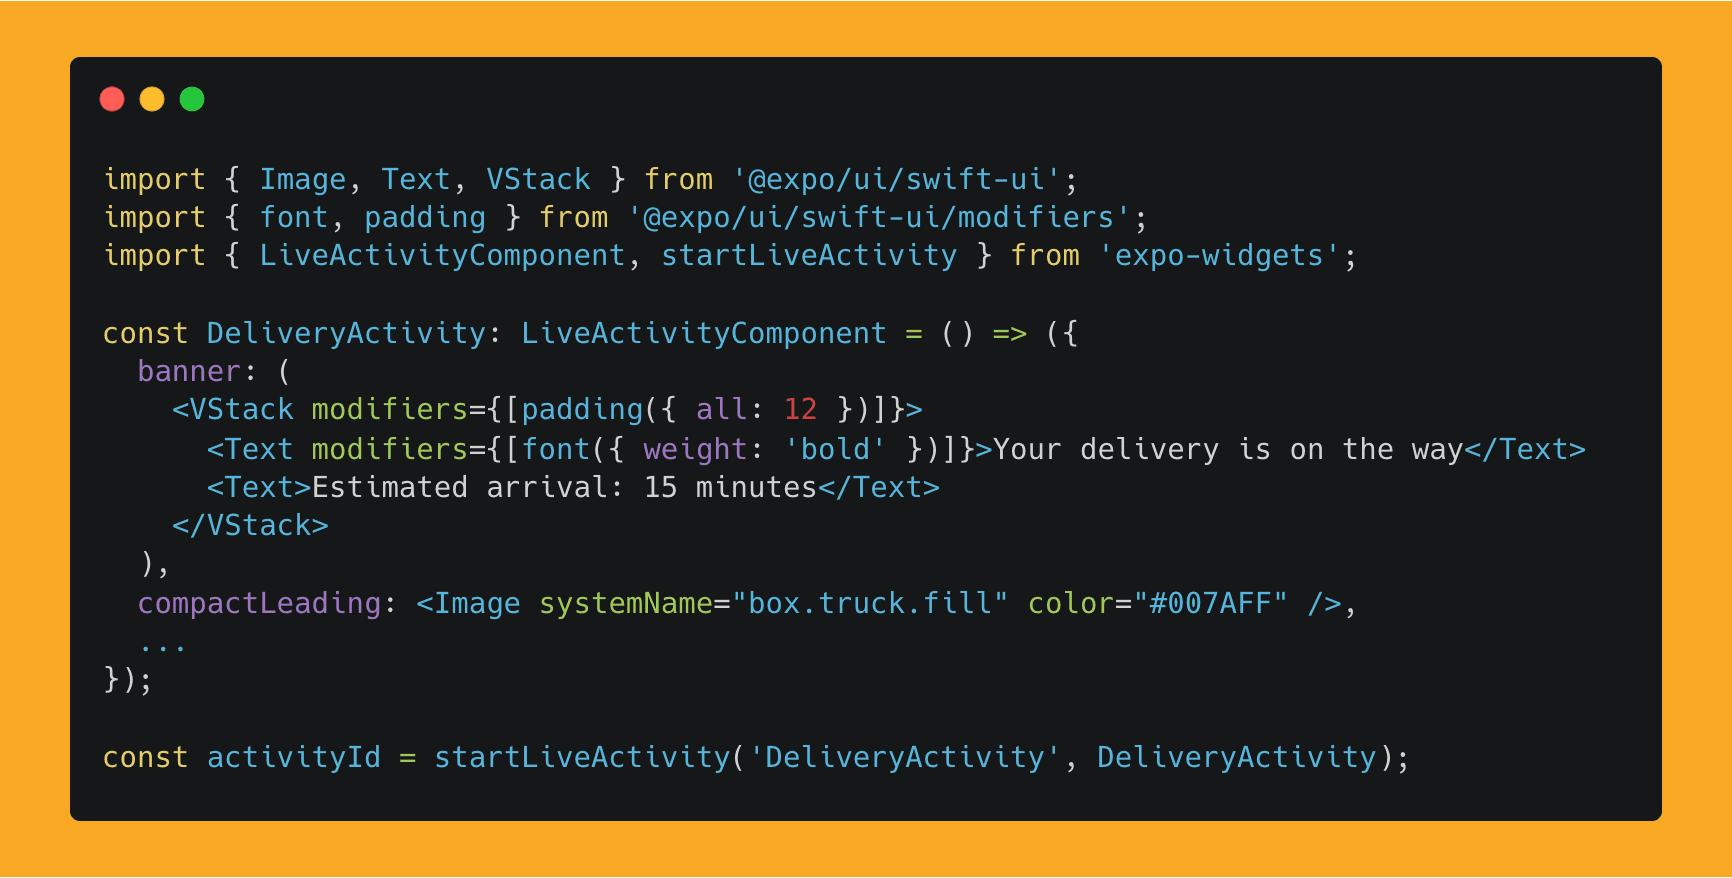
Here is an example of starting a live activity with Voltra:
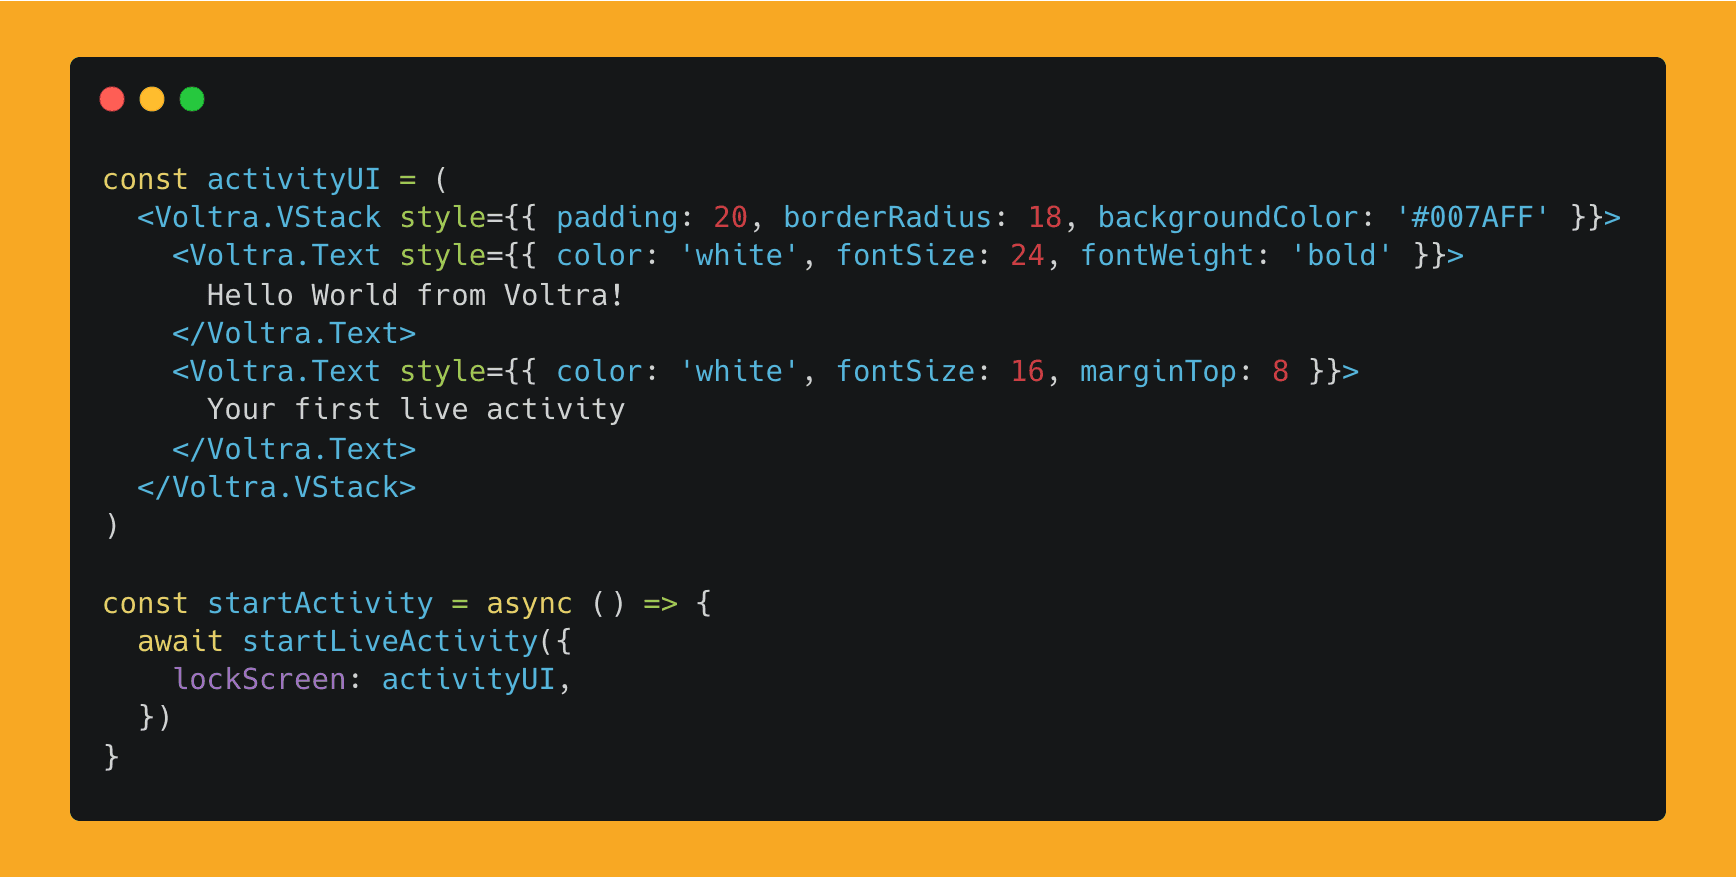
Note that Voltra only supports a limited subset of the React Native style prop, since styling properties are converted to Swift modifiers under the hood. For positioning, Voltra uses Swift’s native layout model, so you build layouts with VStack, HStack, and ZStack, using alignment and spacing props. You can check that out here.
We tried Voltra out and put together a small Live Activity example. The layout was a little challenging to get exactly how we wanted it, but setting it up and managing the Live Activity was a breeze.
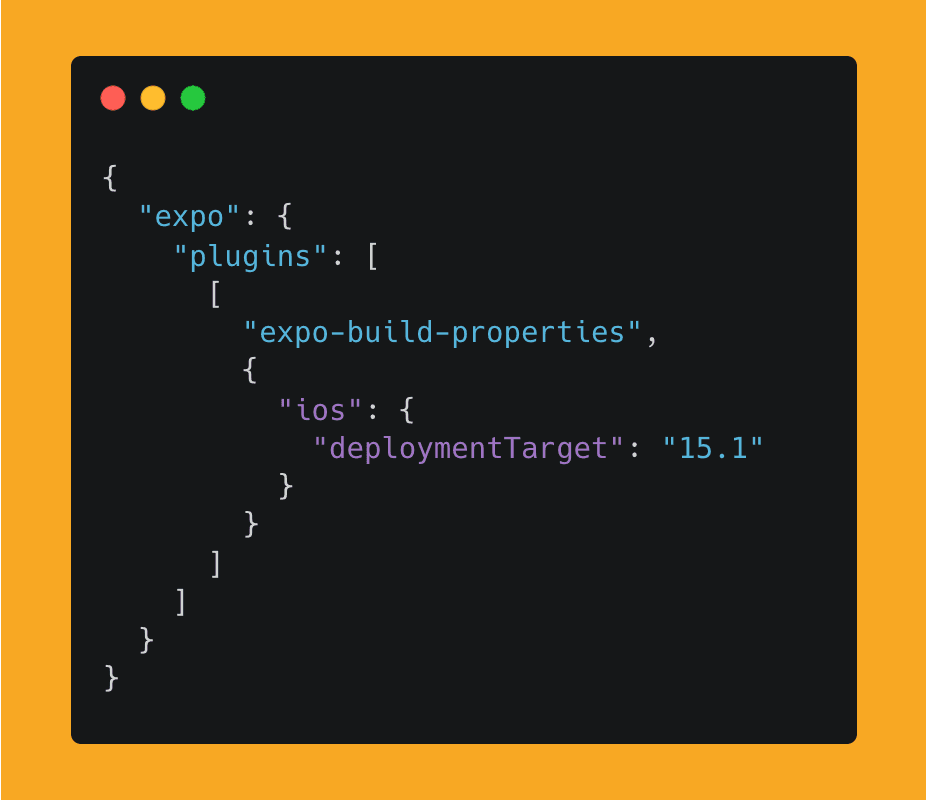
Voltra supports iOS 16.2+. For interactions like buttons in Live Activities, you’ll need to support iOS 17+ or the button won’t work. In Expo, to change the deployment target, you’ll need to install expo-build-properties and set the deployment target:
It’s also important to know that, for now, Voltra is an Expo plugin (Expo only — just use Expo, we told you so 😄), and it’s not supported by Expo Go. You’ll need to set up the Expo Dev Client.
👉 Voltra

Of Course, Expo Has Widgets Too
Expo was close on Callstack’s heels with the release of Expo SDK 55 Beta, which we’ll cover in more depth—at least the important parts—in the next issue once it’s stable. One thing that landed with the SDK beta is Expo Widgets.
That’s right! Not one widget library, but two. And this isn’t Expo’s usual play of wrapping a third-party community library and slapping an Expo prefix on it. This is a Widgets and Live Activities library built on top of Expo UI (i.e. SwiftUI).
We briefly covered Expo UI back in #18, but to recap: Expo UI is—well, it’s in the name—SwiftUI components exposed to React Native. Here is an example of an Expo Live Activity:
The main difference in the API is that with Expo, you use SwiftUI and its modifiers directly, whereas with Voltra, you use Voltra components plus a subset of the React Native style prop. It’s a hard choice, because both libraries are solid.
Our take is that Voltra currently has slightly better documentation and examples, whereas Expo Widgets appears to be more alpha-stage, not in the jacked-on-steroids-yet way.
One important feature (some would argue the most important!) is sending server-side updates to refresh a Live Activity on the frontend. Think tracking a driver’s position and sending updates to both the customer and the driver to be displayed in a Live Activity—where the data lives on the server. This is a very common Live Activities use case: responding to server events.
Expo “may” support this kind of update flow, as it exposes an enablePushNotifications prop. However, the docs currently lack APIs, code examples, or guidance on how to actually implement server-side updates—such as retrieving the push token after starting a Live Activity, sending it to your backend, or handling APNs payloads to remotely update content.
In contrast, Voltra has a dedicated section and a voltra/server package that walks you through implementing server-side updates and pushing data from your server to a Live Activity.
So, if you want great documentation, choose Voltra.
And if you—well—you know… just use Expo, then there’s your answer.

Before you Go: Let’s Talk About Brownies
Brownie—not the kind you eat with a few friends on a Saturday evening in the mountains—but a state library for sharing state between the native layer and the JavaScript layer. And yes, the name actually makes sense this time: not pulled from a box of hats or a game of darts on the periodic table.
Brownie is short for Brownfield, which in React Native terms means an app that is primarily native and integrates React Native only partially—maybe for a portion of the app, or as part of a larger “migrate to React Native” process.
The key difference with Brownie is that the shared state lives on the native side and is exposed to JavaScript via JSI. You define and manage the shape of your store using a *.brownie.ts file:
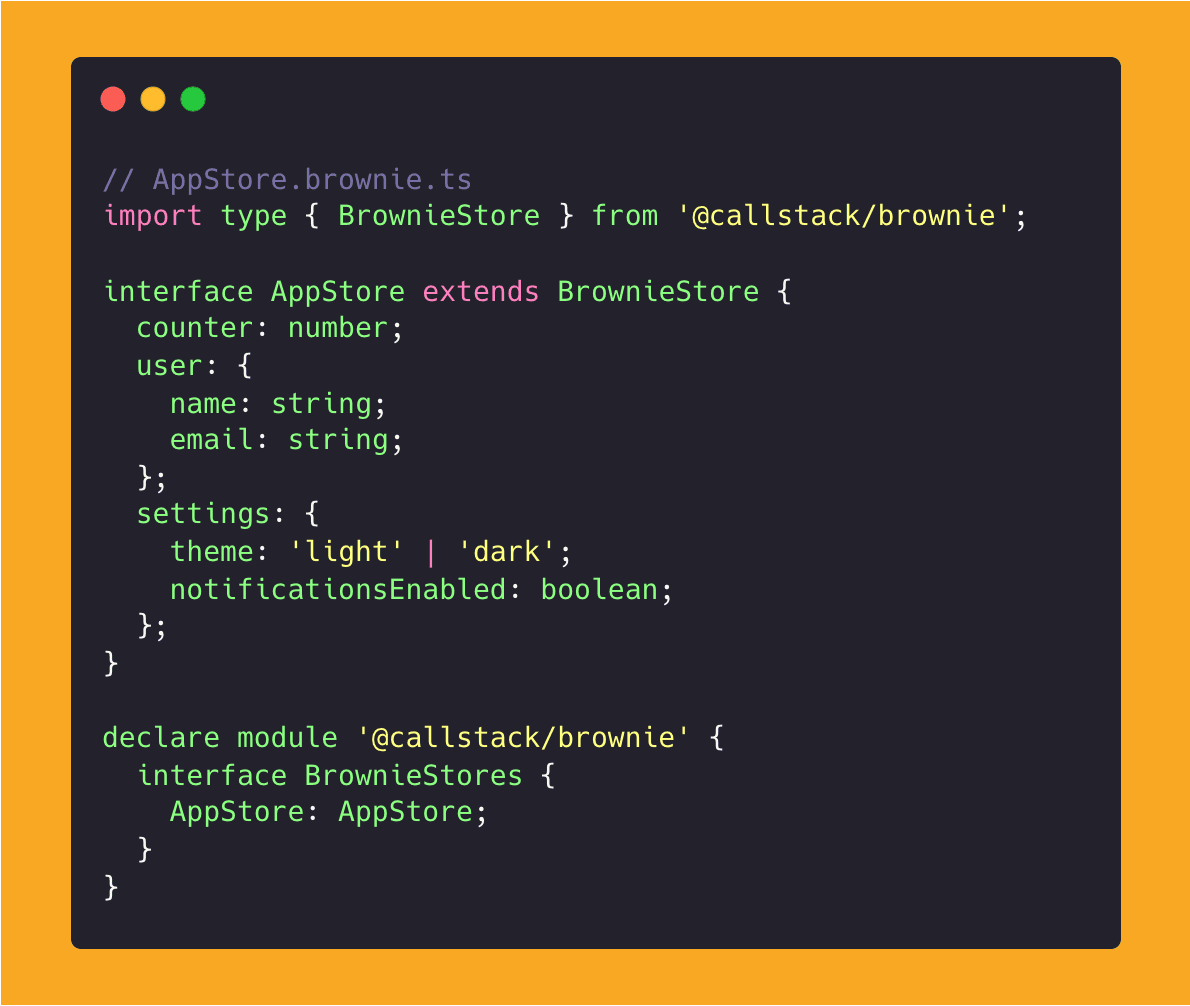
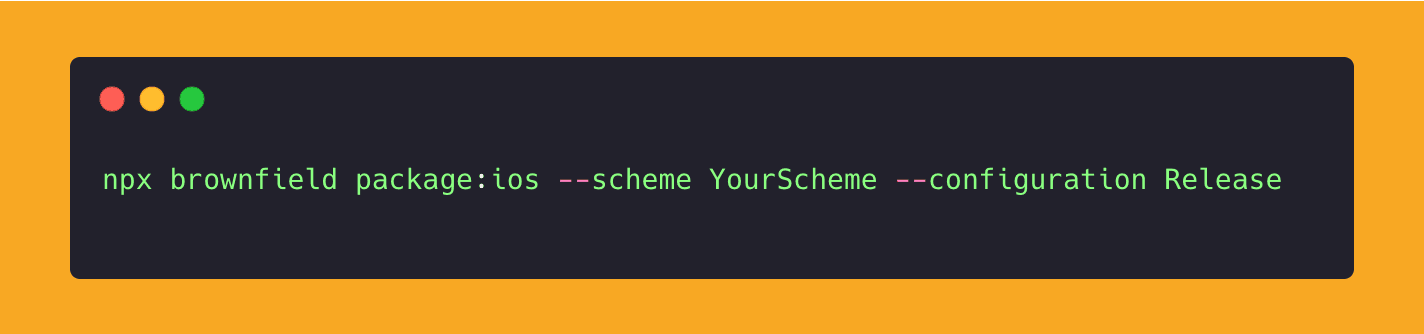
You would then run a command to generate Swift types from the brownie file as an XCFramework (XCFramework is a packaging Apple format that supports multiple architectures and platforms in one distributable framework), which can then be used in your native project to access your store structure.
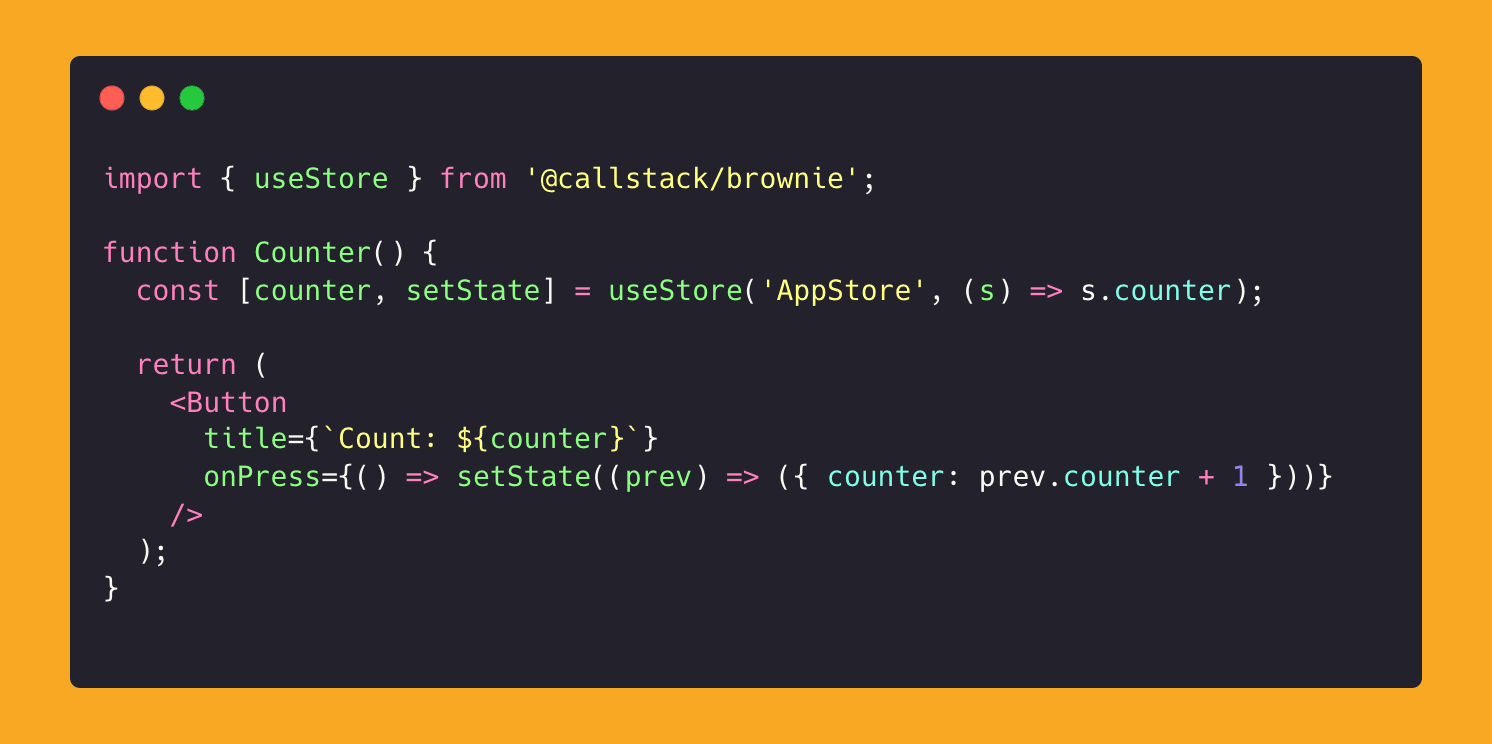
You could then also use the same values in React Native as such:
Essentially, if you’re building or working on an iOS-native application and want to integrate React Native, this makes sharing data between those two worlds ridiculously simple. It avoids, in most cases, custom Turbo Modules to share parts of the application state between native and JS.
Currently, Brownie is in alpha, and Android support is said to be coming soon. Until then, you’ll still need to rely on existing workarounds on Android. The Brownie package is released as part of Callstack’s React Native Brownfield library, so you’ll need callstack/react-native-brownfield installed.
👉 Brownie